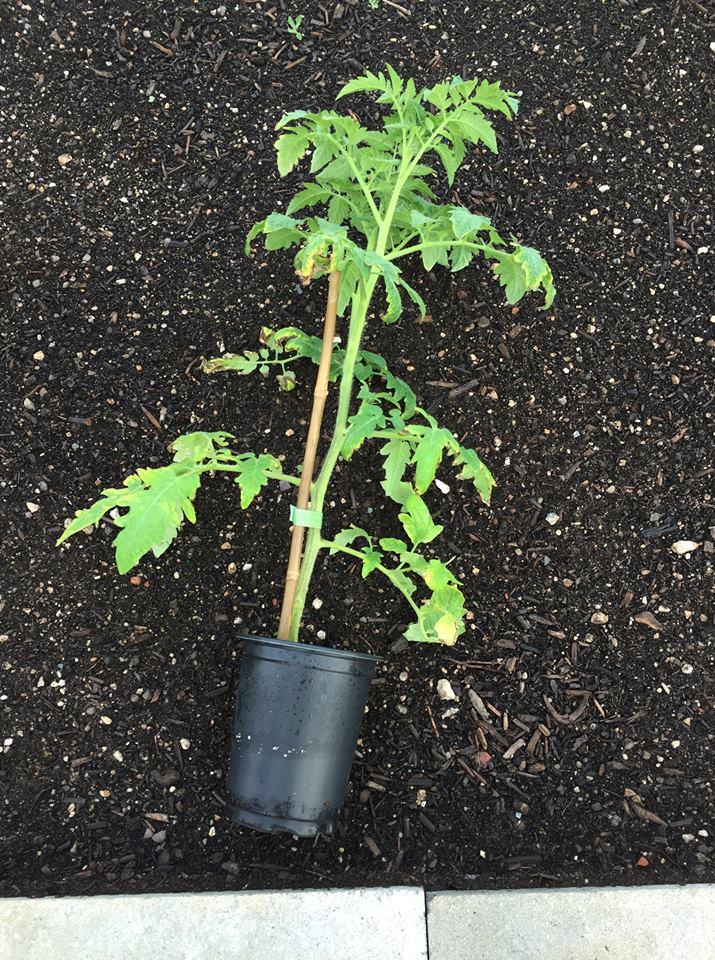
 Amana Orange tomato ready to transplant into the garden. Preparation: 1. Select a sunny spot to grow your tomatoes. Tomatoes need at least 6 to 8 hours of sun to bring out their best flavors, and big tomatoes prefer even more hours of sun. 2. Decide on a support plan before you set out your plants. You will need to stake, trellis, or cage tomato plants directly after planting to keep them off the ground. Keeping tomatoes off the ground will help to avoid diseases, make them easier to harvest, keep the fruit clean, and make it easier to monitor for problems. Support for indeterminate/vining varieties should be at least 4 feet tall. 3. Give each plant enough room to grow and enough room for you to harvest the tomatoes. The space for indeterminate varieties will depend on the type of support you provide it. If you use large cages, you should plant them about 3 feet apart. If growing in containers, you’ll need at least a 24” pot for an indeterminate variety or an 18” pot for a determinant variety. 4. Mix in several inches of compost. This will provide minor nutrients and help hold moisture and any other plant nutrients you give it until it is needed by the plants. Transplanting: 5. Water the plant in the pot well 30 minutes before you start the transplanting process. This will ensure the plant is well hydrated before you plant it which will minimize transplant shock. Additionally, potting mix is a very different texture than garden soil so watering only after it has been transplanted won’t necessarily hydrate the roots because water doesn’t easily move across the garden soil/potting mix border unless they are both well hydrated. 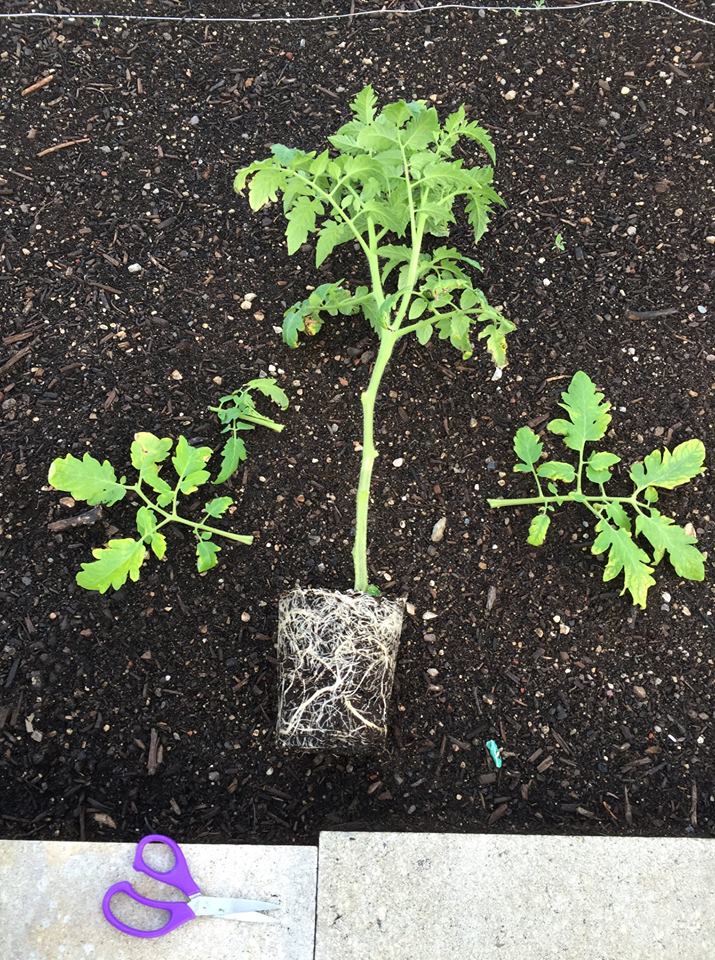 Amana Orange tomato pruned and ready to be planted. 6. Transplant in the cool part of a calm day. Most seedlings were grown in a greenhouse and are not accustomed to full sun and strong winds so transplant in the cooler part of a calm day and water immediately after planting help the seedlings settle in. 7. Bury ½ or more of the stem when planting. This crucial step allows all those tiny “hairs” on the main stem of the plant to sprout into roots so your plant will be stronger and better able to find water during a drought (please note that this deep-planted method only works with tomatoes and tomatillos. DON’T do this with every plant they don't all work this way!). You can do this by either digging deeper straight down or by digging a trench and laying the plant in side-ways with just a portion of it sticking above the soil. The part of the plant sticking above the soil will grow upright. 8. Remove the leaves and stems that touch the ground. If you transplant a large tomato plant (more than 12” above the soil line) do this at planting. If you transplant a small tomato plant, wait until it grows 12” or more and then remove the leaves and stems that touch the ground. These are the leaves that are most likely to develop fungus problems, increases airflow, and spurs the plant to grow taller. When removing leaves and/or stems, be sure to use clean hands and sanitized clippers to avoid passing on any diseases. 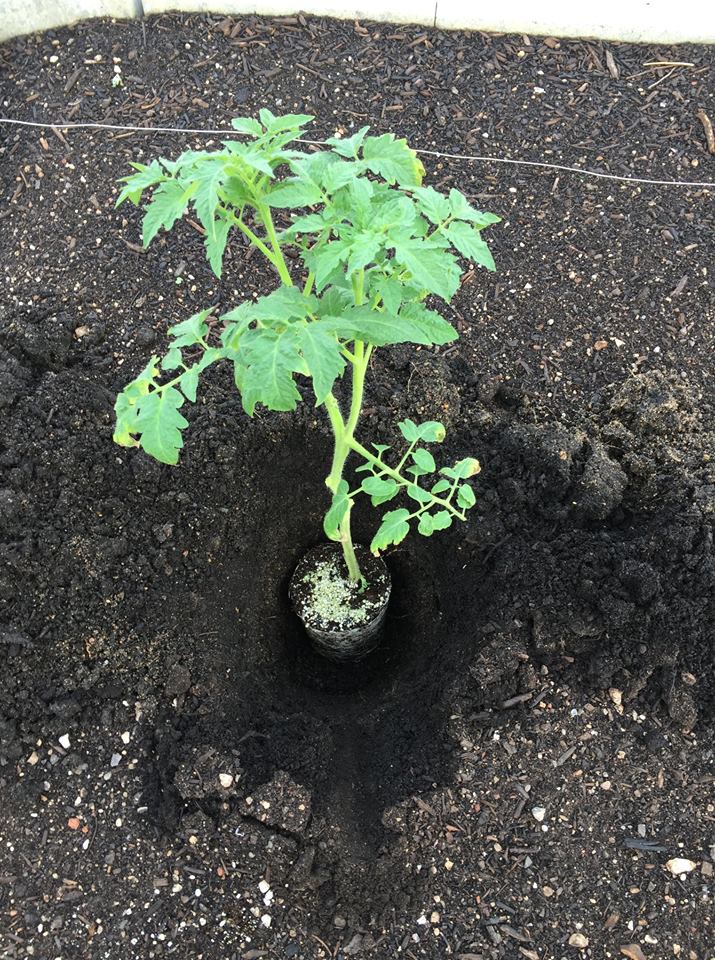 Amana Orange tomato in a hole dug so that about 1/2 the stem will be buried. After Transplanting: 9. Mulch the plants once the soil has warmed. Adding a few inches of mulch will help conserve water and helps minimize the soil and soil-borne diseases from splashing up on the plants. Since tomatoes love heat, allow the sun to warm the soil before adding a few inches of your favorite mulch. 10. Water the soil around the plants (not the leaves) regularly. There are many opinions on what “regularly” means, but the plant will adapt early on what you do. If you water a little every day the plant will focus more of its energy on growing the above-ground portion of the plant because it senses that it doesn’t need a larger root system to sustain itself. If you water about 1 inches every 5-7 days (up to 2” when the plant is larger and dealing with the summer heat) it will initially focus its energy on growing a larger root system which will later feed the top of the plant. Regardless of which “regularly” you use, be consistent on timing throughout the whole season. Inconsistent watering leads to splits and blossom end rot. 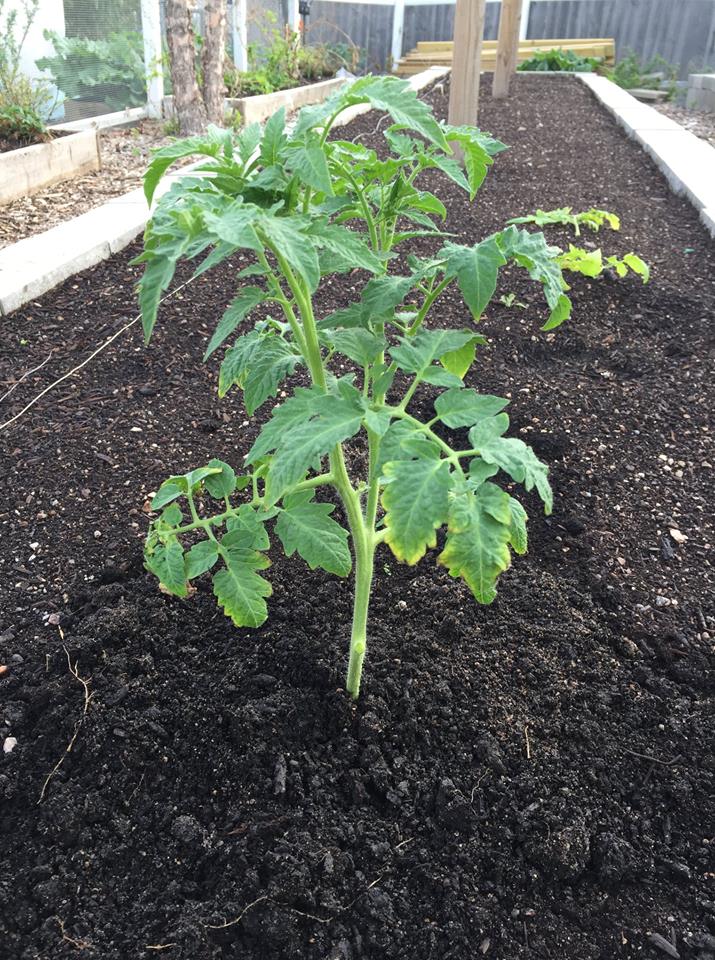 Amana Orange tomato planted and ready to go in the garden. |
Archives
April 2022
Categories
All
|
 RSS Feed